As a concerned parent, you must know how to wash baby feeding bottle, and learn how to sterilize the feeding equipment when you’re bottle-feeding properly.
Since a newborn’s immune system aren’t strong enough to fight off infections, you must continue sterilizing everything until your baby is 12 months old.
In this article, we will share with you practical methods on how to wash baby feeding bottle and also how to properly sterilize your baby feeding bottle.
Why is It Necessary To Clean And Sterilize Baby Feeding Bottles?
Newborns have a premature immune system; when their body is exposed to infections, their immune system won’t be strong enough to fight them off.
One important way to support your baby in staying healthy is to reduce the chances of her getting sick in the first place by cleaning and sterilizing their bottle after every feed.
Milk is a perfect medium that encourages bacteria growth. This is why it’s important to sterilize all feeding equipment and keep your baby’s formula cold before feeding your baby.
Read Also: How To Prepare Formula Bottles in Advance
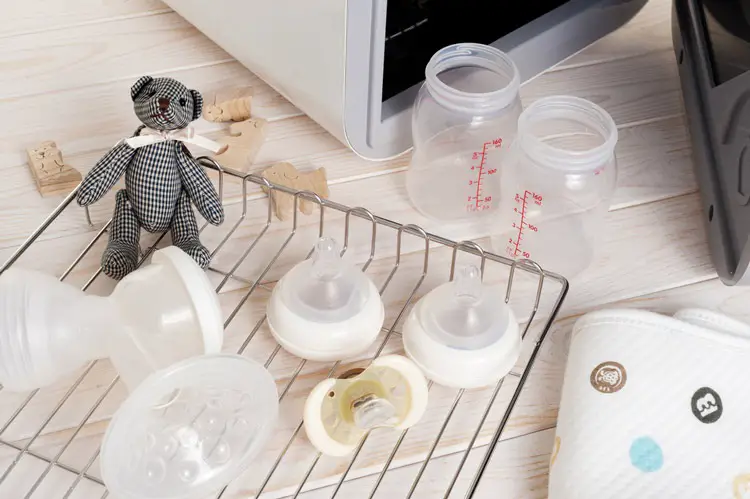
How To Wash Baby Feeding Bottle: Things You’ll Need
What Equipment Needs Cleaning?
If you’re bottle-feeding your baby with breast milk or infant formula, you’ll need to clean and sterilize all bottle parts, screw caps, and teats.
To get your baby feeding bottle properly cleaned you’ll need these few things.
- Mild Dishwashing Soap
- Hand Towel
- Bottle Brush
- Clean Water
Read Also: What To Do With Used Baby Bottles (8 Creative Ideas)
How To Wash Baby Feeding Bottle: Cleaning Method
- Disassemble all bottle parts and pull the teat out of its screw cap.
- Use soapy water to wash your hands. Then dry with a clean towel.
- Then use hot water and dishwashing detergent to wash all baby feeding parts.
- Use a bottle brush to clean all areas of the bottle, including the thread where the cap screws on.
- Remove milk still in the teat or the hole with a teat brush. Ensure this is done because this is where bacteria are most likely to grow.
- Squirt hot, soapy water through the teat hole, and do the same with clean water to rinse the teat.
- Make sure to rinse the bottles and equipment thoroughly.
Remember to get a new bottle brush once the bristles are worn. They must be stiff enough to remove the milk residue inside your baby’s feeding bottle.
How To Wash Baby Feeding Bottle: Sterilization
Do not be deceived if bottle parts and teats look neat. They might contain germs that can easily be transferred to your baby, so you must sterilize your baby’s feeding equipment properly.
There are 4 ways you can sterilize your bottle-feeding equipment after you’ve cleaned it:
- Boiling
- Chemicals
- Steam Sterilization
- Microwave Sterilization.
If you’re breastfeeding and only need to sterilize a bottle occasionally, the boiling method may be a better choice.
It’s quite affordable than buying a steam sterilizer. If you’re bottle-feeding, then a steam sterilizer is needed.
Sterilizing By Boiling
This is the simplest and most reliable way to sterilize baby feeding bottle parts. To do this
- Put all parts of the washed bottle, including teats and caps in a large pot.
- Fill the pot with tap water until everything is covered. Ensure all air bubbles are gone.
- Now put the large pot on the stove and allow it to boil for 5 minutes.
- Allow the feeding parts to cool in the pot until you can take it out with tongs or clean hands without scalding yourself.
- Remember to shake off excess water. You do not need to dry the items.
- Store feeding parts you are not using in a clean, sealed container in the fridge. Always clean these containers with hot soapy water, and rinse thoroughly with very hot water daily. It is best advised to have at least two containers that you can alternate.
- Finally, use all equipment within 24 hours of boiling.
Sterilizing Using Chemicals
Be careful when using chemical sterilization. You can sterilize your bottles with an antibacterial solution. This can come in both liquid or tablet form.
The bleach must be diluted with water to make this safe for your baby. Remember, this must be prepared exactly as directed on the container.
Here’s how to sterilize your baby’s feeding bottle with chemicals:
- Ensure you follow the manufacturer’s guide carefully when preparing the solution. The right strength is required to kill stubborn germs in your baby’s feeding bottle.
- Completely submerge all bottles and feeding parts (teats and caps) in the solution. Ensure no bubbles are left in the bottles.
- Leave everything in the solution for the recommended time.
- Use tongs to remove the feeding parts from the solution. Before use, shake off excess solution, but you don’t need to rinse the feeding parts.
- Finally, store baby feeding parts in a clean, sealed container in the fridge or the solution.
Note: If you store baby feeding parts in the fridge, ensure you use them within 24 hours after sterilization.
If you leave parts in the solution, throw the solution away after 24 hours, then scrub the container and parts in warm soapy water and restart the sterilization procedure again.
Steam Sterilizing
Steam sterilizers are automatic units that cook your baby’s feeding parts at a temperature high enough to kill bacteria. This method is popular because they are cheap and works very effectively. Some of these steam sterilizers are designed to operate in a microwave.
- Place the clean bottles and feeding parts in the sterilizer.
- Ensure that there is enough space between each baby bottle, teat, and screw cap for proper circulation of steam all through the surface.
- Follow the manufacturer’s guide about how much water to add.
- Turn on and push the start button.
- Wait until the sterilization cycle has finished and the light goes off.
- Store all equipment you aren’t using in a clean, sealed container in the fridge.
- Ensure you use all baby feeding parts within 24hrs of sterilization.
Microwave Steam Sterilizers
These are similar to steam sterilizers, but you put them in the microwave oven:
- Firstly, place the sterilizer in the microwave and turn it on for the appropriate time.
- Wait until the sterilization is complete and the light goes off.
- Do not put any metal inside these sterilizers.
- Store all sterilized baby feeding parts in a clean, lidded container in the fridge.
- Sterilize all baby feeding parts again if you haven’t used them within 24 hours.
How To Wash Baby Feeding Bottle In A Dishwasher
- Disassemble all baby feeding bottle parts, including bottles, nipples, caps, and valves.
- Rinse all feeding bottle parts and other items by holding them under tap water. It is ok if the water is hot or cold.
- Now place baby bottle parts and other feeding items in the dishwasher. (Make sure you place small items into a closed-top basket or mesh laundry bag, so they don’t end up in the dishwasher filter.) Alternatively, run the dishwasher using hot water and a heated drying cycle to kill more germs.
- Always wash your hands with mild soap and water before you take out and store cleaned items.
- Finally, supposing your baby’s items are not completely dry, place them on a clean, unused dish towel or paper towel to air-dry thoroughly before storing them. Do not use a dish towel to rub or pat items to dry because they might transfer germs back to the items.
Read Also: How To Get Yellow Stains Out Of Baby Bottle Nipples
Conclusion
Because of the entire nooks and crannies baby feeding parts have, they can trap small food particles and grow bacteria easily, putting your baby’s health at risk.
However, with the right tools and our step-by-step guide, you’ll have become an expert in washing your baby feeding bottle.
If you have any other tips and experiences on how to wash baby feeding bottle, drop your comment or suggestion down below. We would love to hear it